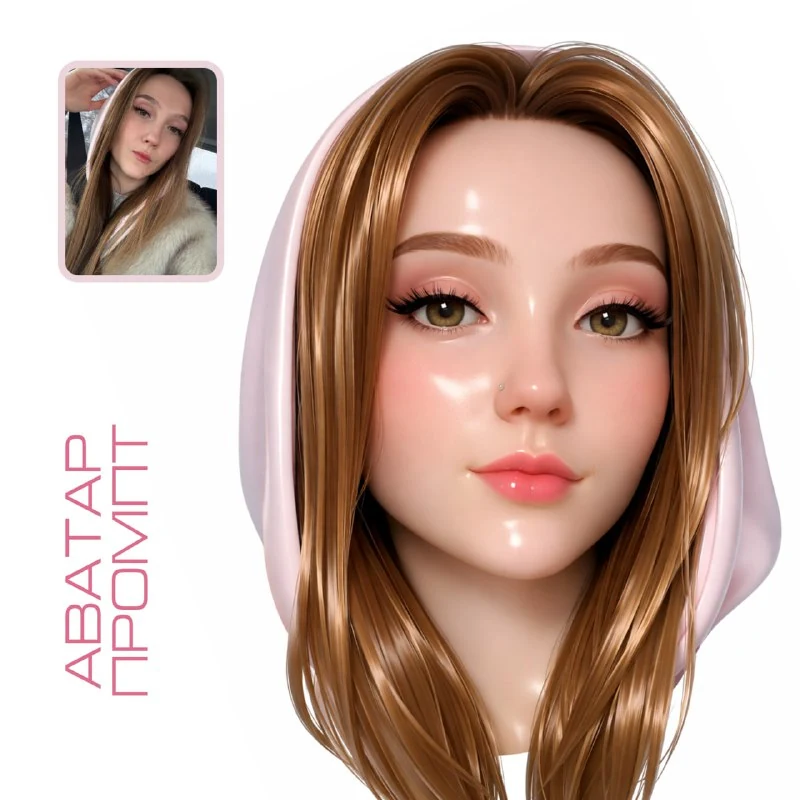
Choose a selfie with a clear face shape
A request for a stylized character head was posted in author's comments . He specifies the material and lighting in detail, and the photograph must be attached separately. Start with one person, clearly visible eyes, hair and general facial outline.
Strong shadow, wide-angle distortion, or hair in front of half the face make comparison difficult. Choose a shot with a normal expression and fairly soft light. Do not improve it in advance with a filter that changes the nose, lips and chin: otherwise the source will become an already changed portrait.
Decide what is most important for recognition. This could be a hairline, eyebrow shape, glasses or an overall oval shape. Write down two or three features before generation and check them after. This preparation helps distinguish a good-looking random character from a suitable avatar.
Prompt for a glossy character head
Glossy stylized 3D head
Ultra-stylized 3D character head render, floating head, ultra clean topology, smooth rounded anatomy, hyper-polished porcelain skin, glossy ceramic surface, strong specular highlights, soft subsurface scattering, waxy plastic skin shader, minimal micro-detail, slightly exaggerated facial proportions, relaxed neutral expression, glossy lips, elegant symmetrical face geometry. Hair made of smooth sculpted flowing strands, shiny polymer material, reflective surface, premium CGI animation quality, modern high-end animation studio style, Pixar / Disney level rendering, ultra clean surfaces, toy-like surreal realism. Soft cinematic studio lighting, global illumination, ray-traced reflections, depth of field, beauty render, octane render style, hyper detailed shading, extremely clean 3D look, minimal background, centered composition, 8k, masterpiece.Floating head specifies a separate head without a body, and centered composition places it in the center. Therefore, it is convenient to use the request for a portrait icon. If you want a waist-length character, you need to change that structure, not just ask for clothes to be added at the end.
The source contains several names of studios and rendering reference points. They describe the desired aesthetics of an image. The mention of octane render style does not turn the result into a 3D scene file, and words about topology do not confirm the presence of a finished model. Here we get an illustration with a three-dimensional look.
Sort out skin, hair and highlights
Hyper-polished porcelain skin gives very smooth skin, while glossy ceramic surface enhances the ceramic shine. Small details are deliberately limited. If you're expecting a generic, realistic portrait with natural skin texture, this part of the request will work against the challenge.
The hair is described as smooth, sculpted strands of shiny polymer material. They should form large, understandable volumes. When each hair turns into a separate thin thread, the silhouette loses its integrity and is less readable in a small avatar.
Compare the highlights on the forehead, nose and cheeks. They should help you see the shape, and not look like white spots on top of the face. If the gloss covers your eyes or lips, reduce the intensity of the specular reflections. Changing the background color alone will not correct a surface that is too bright.
Check similarity after styling
The request contains slightly exaggerated proportions and symmetrical geometry. These instructions may vary depending on your individual needs. It does not have a separate detailed command to save a face from a selfie, so if necessary, add it to the working version and still compare the result with the photo.
Look at the distance between the eyes, jawline, hairstyle and type of expression. Then rate the entire avatar. Sometimes one feature is preserved very accurately, but the rest have changed so much that the portrait is no longer perceived as the same person.
Don't try to fix everything in one step. First, clarify the recognizable face shape, then the expression, then the material. If you change proportions, light, and background at the same time, it will be difficult to understand which edits helped and which ones returned an error.
Give a round preview before exporting
Open the image in the editor and apply a circle crop. The crown, chin and important accessories should remain inside. If the head fills the square to the brim, the hair or glasses may disappear when cropped in a circle.
Reduce the preview to the size in which you usually see your avatar in the chat list. Check that the eyes remain distinguishable and that the hair does not blend into the background. The simple solid color backing from the original request often helps more than an additional decorative design.
Save the full frame and a separate version for the profile. If necessary, place the name of the project next to, and not on top of, the face. For another task with your own photo, you can look at the sticker pack with several emotions : a series of expressions is important there, but here one stable portrait sign.
Select the inscription for the next layout
To design a profile next to the avatar, you may need a separate inscription. Creative typography contains examples of text effects and prompts; You can start with a demo.